Login to COM
- Go to https://com.nycdot.io
- Click on the blue-colored login button and follow the instructions.
Go to Projects
- Click the left menu and Select Projects
- Click on the green Add button at the top right-hand side of the screen.
- A New Window will open showing 3 Steps for Creating a New Project
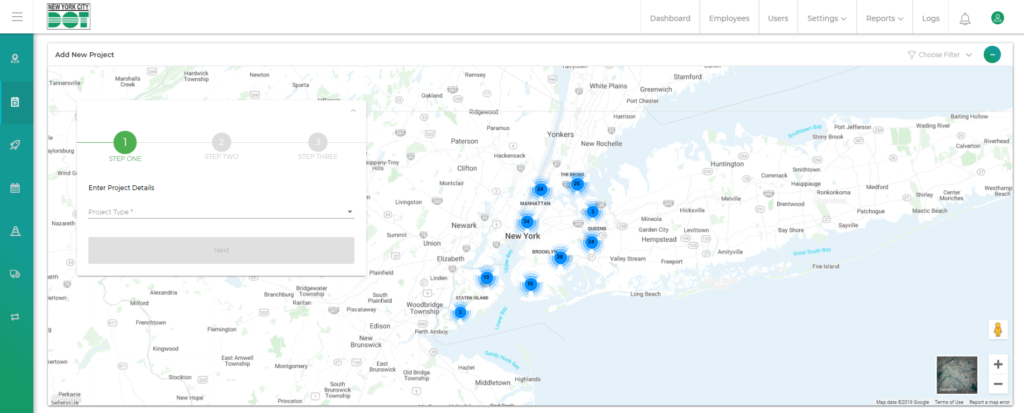
Step 1: Add Project Stretch
- Enter the Project Type (See Figure 1)
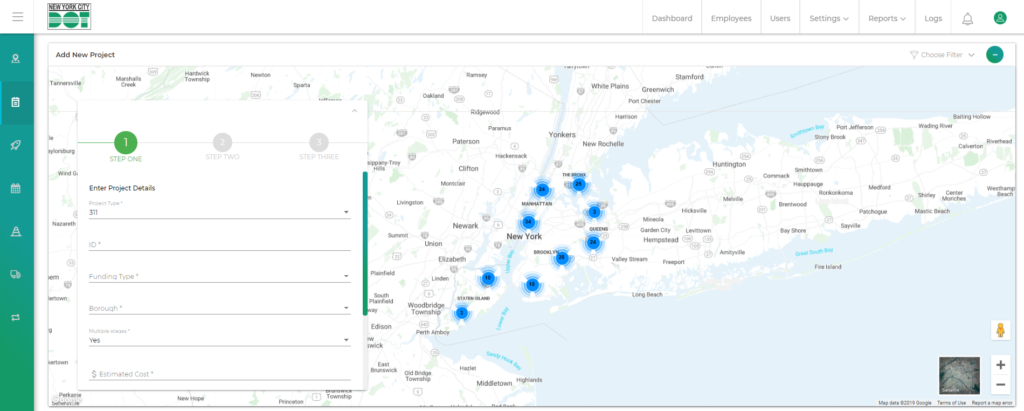
- Indicate the Project ID (See Figure 2)
- Indicate the Funding Type (See Figure 2)
- Indicate the Borough where the Project is located (See Figure 2)
- If this Project requires multiple stages, then select ‘Yes’ for Stages Required field. (See Figure 2)
- Add the Estimated Cost for this Project (See Figure 2)
- Add the Estimated Delivery Date for this Project (See Figure 2)
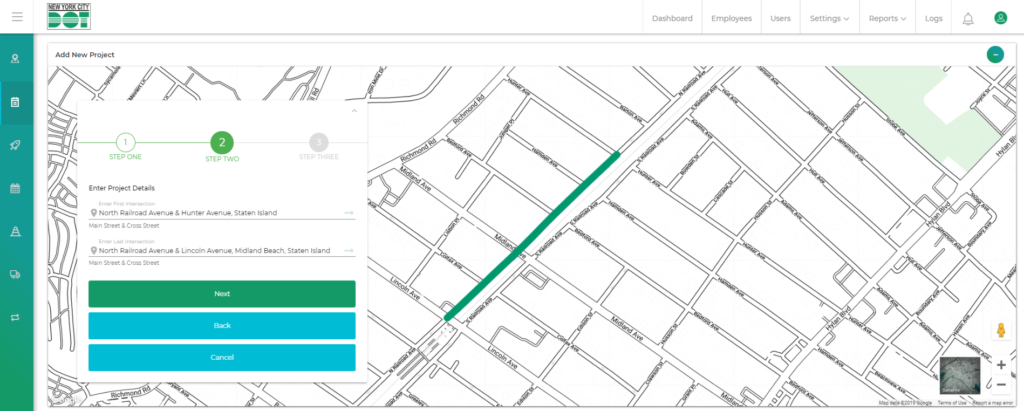
Step 2: Define the Project Stretch
- Enter the First Intersection of the Project Stretch. Provide the main street and cross the street. (See Figure 3)
- Enter the Last Intersection of the Project Stretch. Provide the main street and cross the street. (See Figure 3)
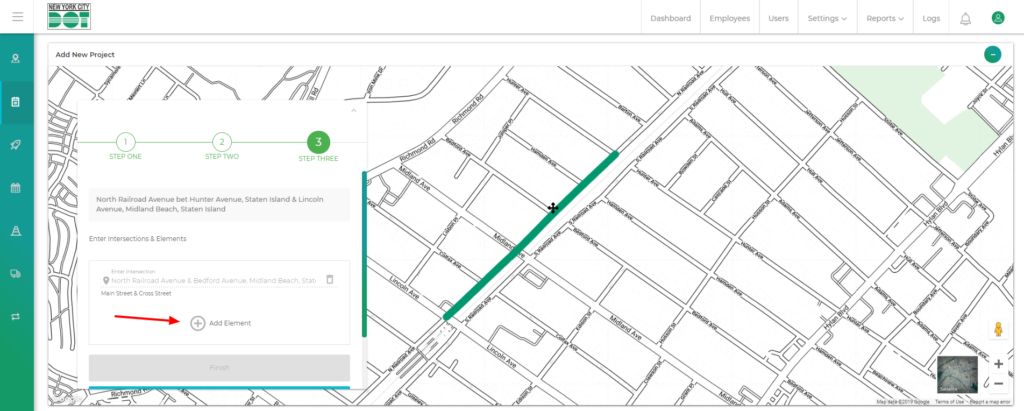
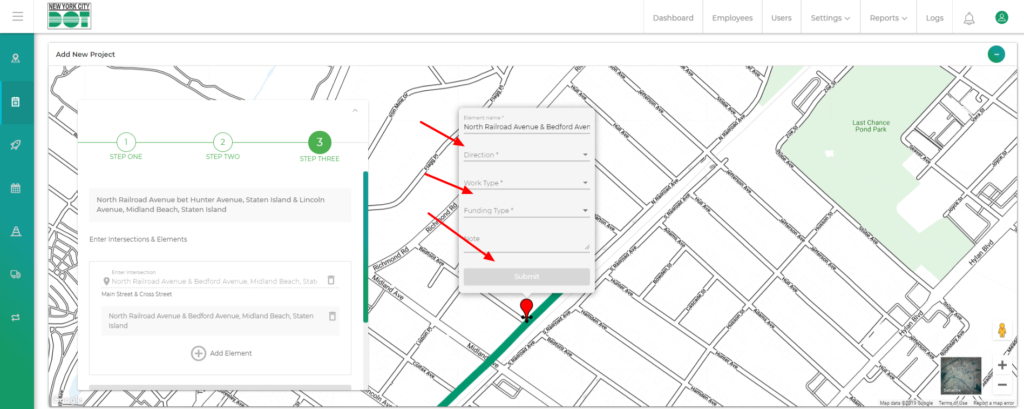
Step 3: Add each Intersection along with the associated Elements (work types)
- Enter the first intersection where work will be performed. Provide the main street and cross the street. Once entered, an intersection marker will be placed on the map.
- Click the “Add element” button. An Element Pin will be placed on the map at the intersection that was previously defined. (See Figure 4)
- Indicate the Element parameters: (See Figure 5)
- Direction: corner direction where the Sub Project is located
- Work Type: type of work that is being performed
- Funding Type: type of reimbursement that will be used to cover Sub Project cost
- Notes: add any additional notes for the Sub Project
- Continue this process for each Intersection & Sub Projects within the Project Stretch.
- Finally, after everything is done click on “Finish”.
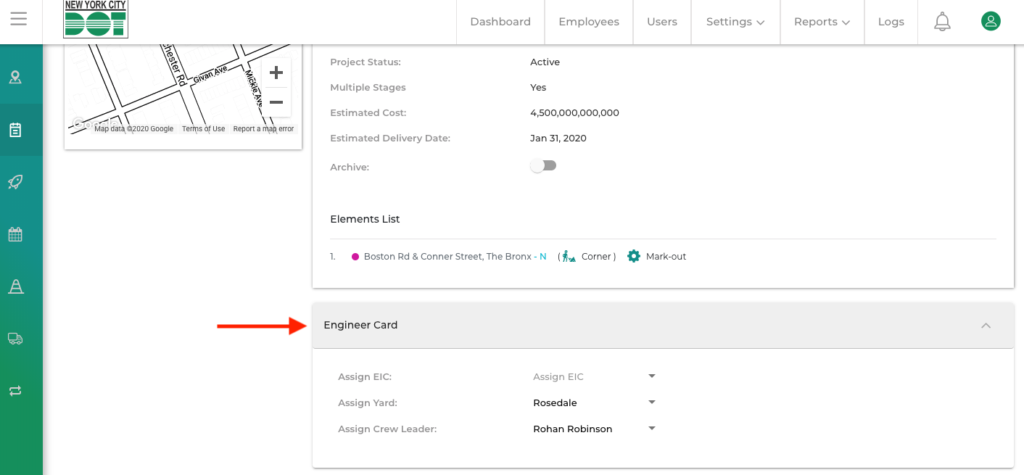
Step 4: Assign the EIC, Project Yard and Crew Leader
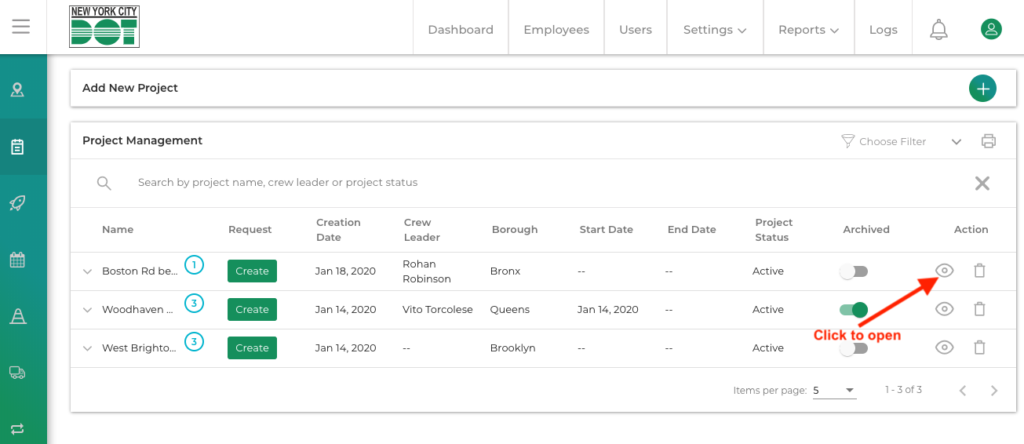
- Once your new Project has been added, go back into the Project screen and open the project by clicking the eye icon (See Figure 6).
- Open the Engineer Card and Select the EIC, Yard and Crew Leader (See Figure 7).