Login to COM
- Go to https://com.nycdot.io
- Login with Employee ID and Password.
Go to the Project profile page for any project
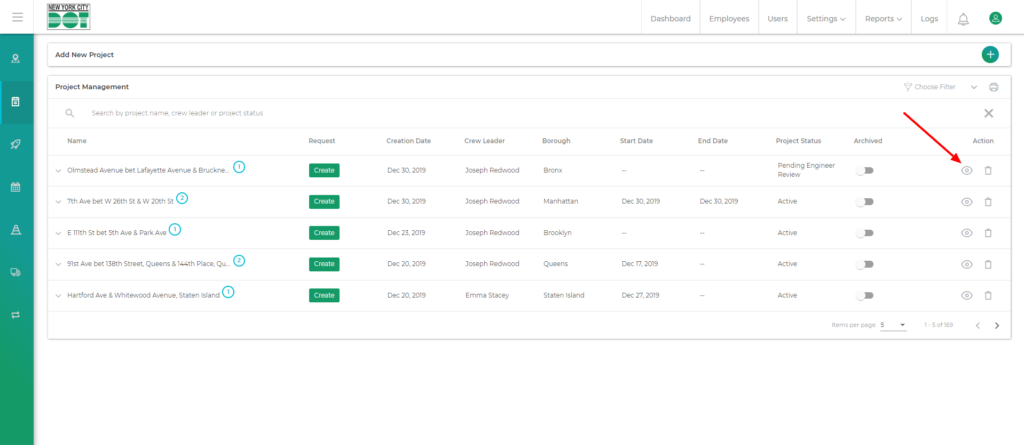
- Hover on the left menu and select projects.
- Click on the view icon for your desired project. (See Figure 1)
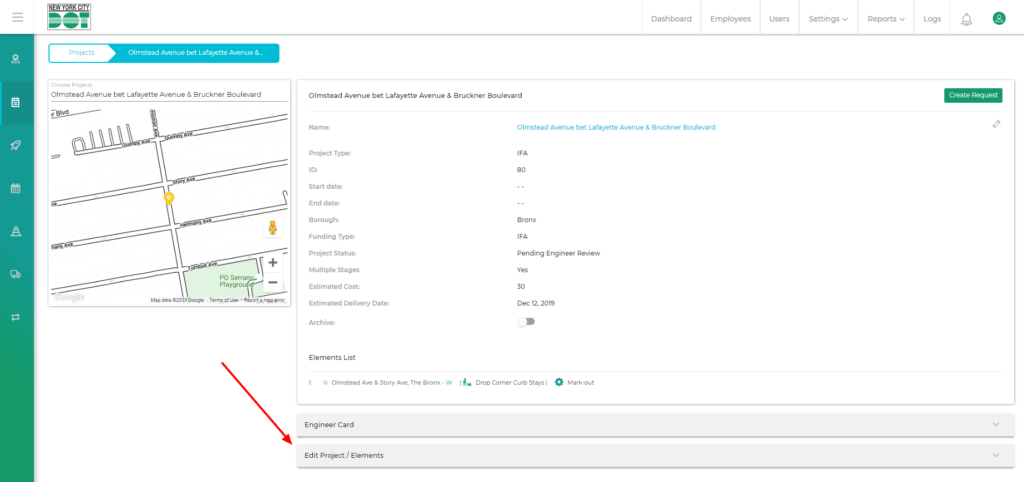
- On entering the project profile screen scroll down to the very bottom where you see Edit projects/elements.
- Click on Edit projects/elements tab. (See Figure 2)
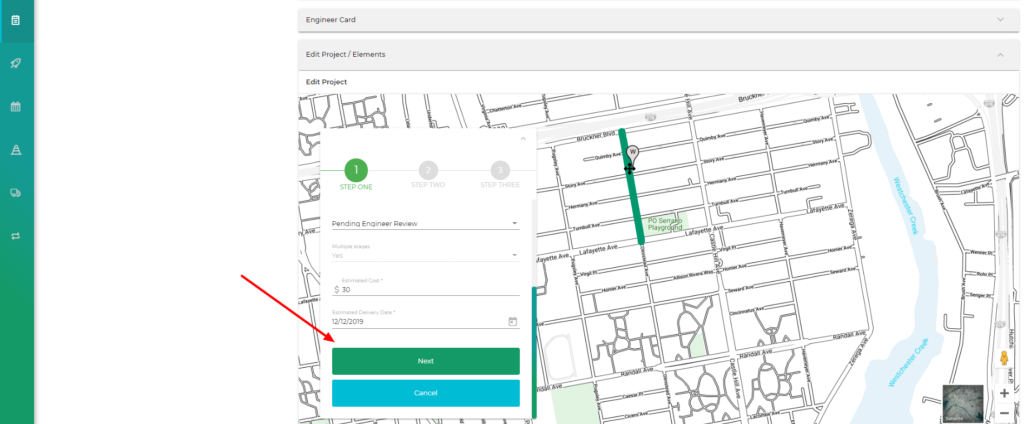
- You will see the Enter project details box where you can see the project details.
- Click on “Next” to get to step 2 which will show you the intersection names. (See Figure 3)
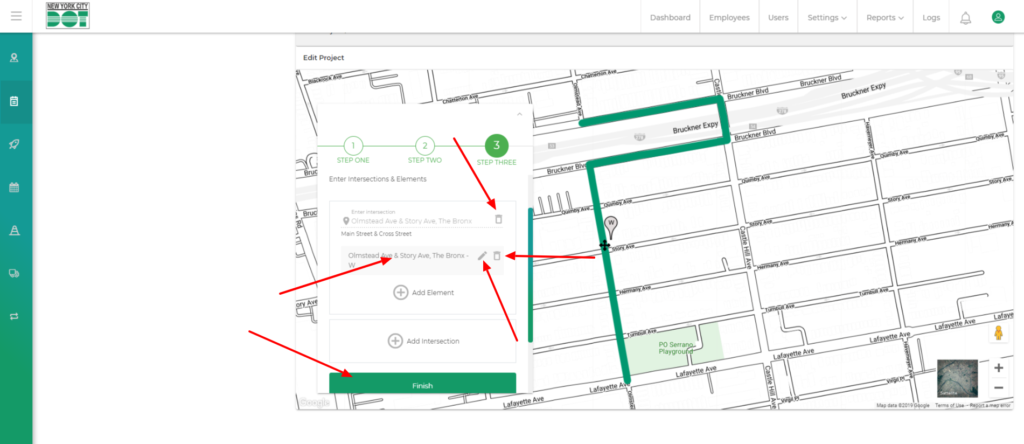
- When on step 2, click on the text area for the intersection that you want to change. (See Figure 4)
- Change the intersection name the way you want to.
- Witness the green project line change on the map as you change the intersection and press “Enter”.
- Click on next again to go to step 3.
- Now you can add a new intersection or delete an existing intersection for the elements. (See Figure 5)
- When you are done, click on the finish button. (See Figure 5)